
Build Design Systems from Claude Desktop and Cursor (Yes, Really!)
Create reusable design systems directly from your AI assistant using MCP. No clicking, no forms - just conversation.
We just launched Design Systems for VibeFlow, and the coolest part isn’t even the design system itself - it’s how you create them.
Create Design Systems from Claude Desktop & Cursor
You can now create and manage entire design systems directly from Claude Desktop or Cursor using Model Context Protocol (MCP). Simply tell Claude what you want in natural language.
Here’s what it looks like:
You: "Use the VibeFlow MCP to create a design system called 'Modern SaaS UI' with a clean, minimal aesthetic for B2B applications. Use blue as the primary color and include dark mode support."

Claude:
        Creates the design system in your VibeFlow account
        Adds color palettes (light and dark mode)
        Defines typography scale
        Sets up spacing system
        Creates component guidelines

The design system appears instantly in your VibeFlow account.
How It Works
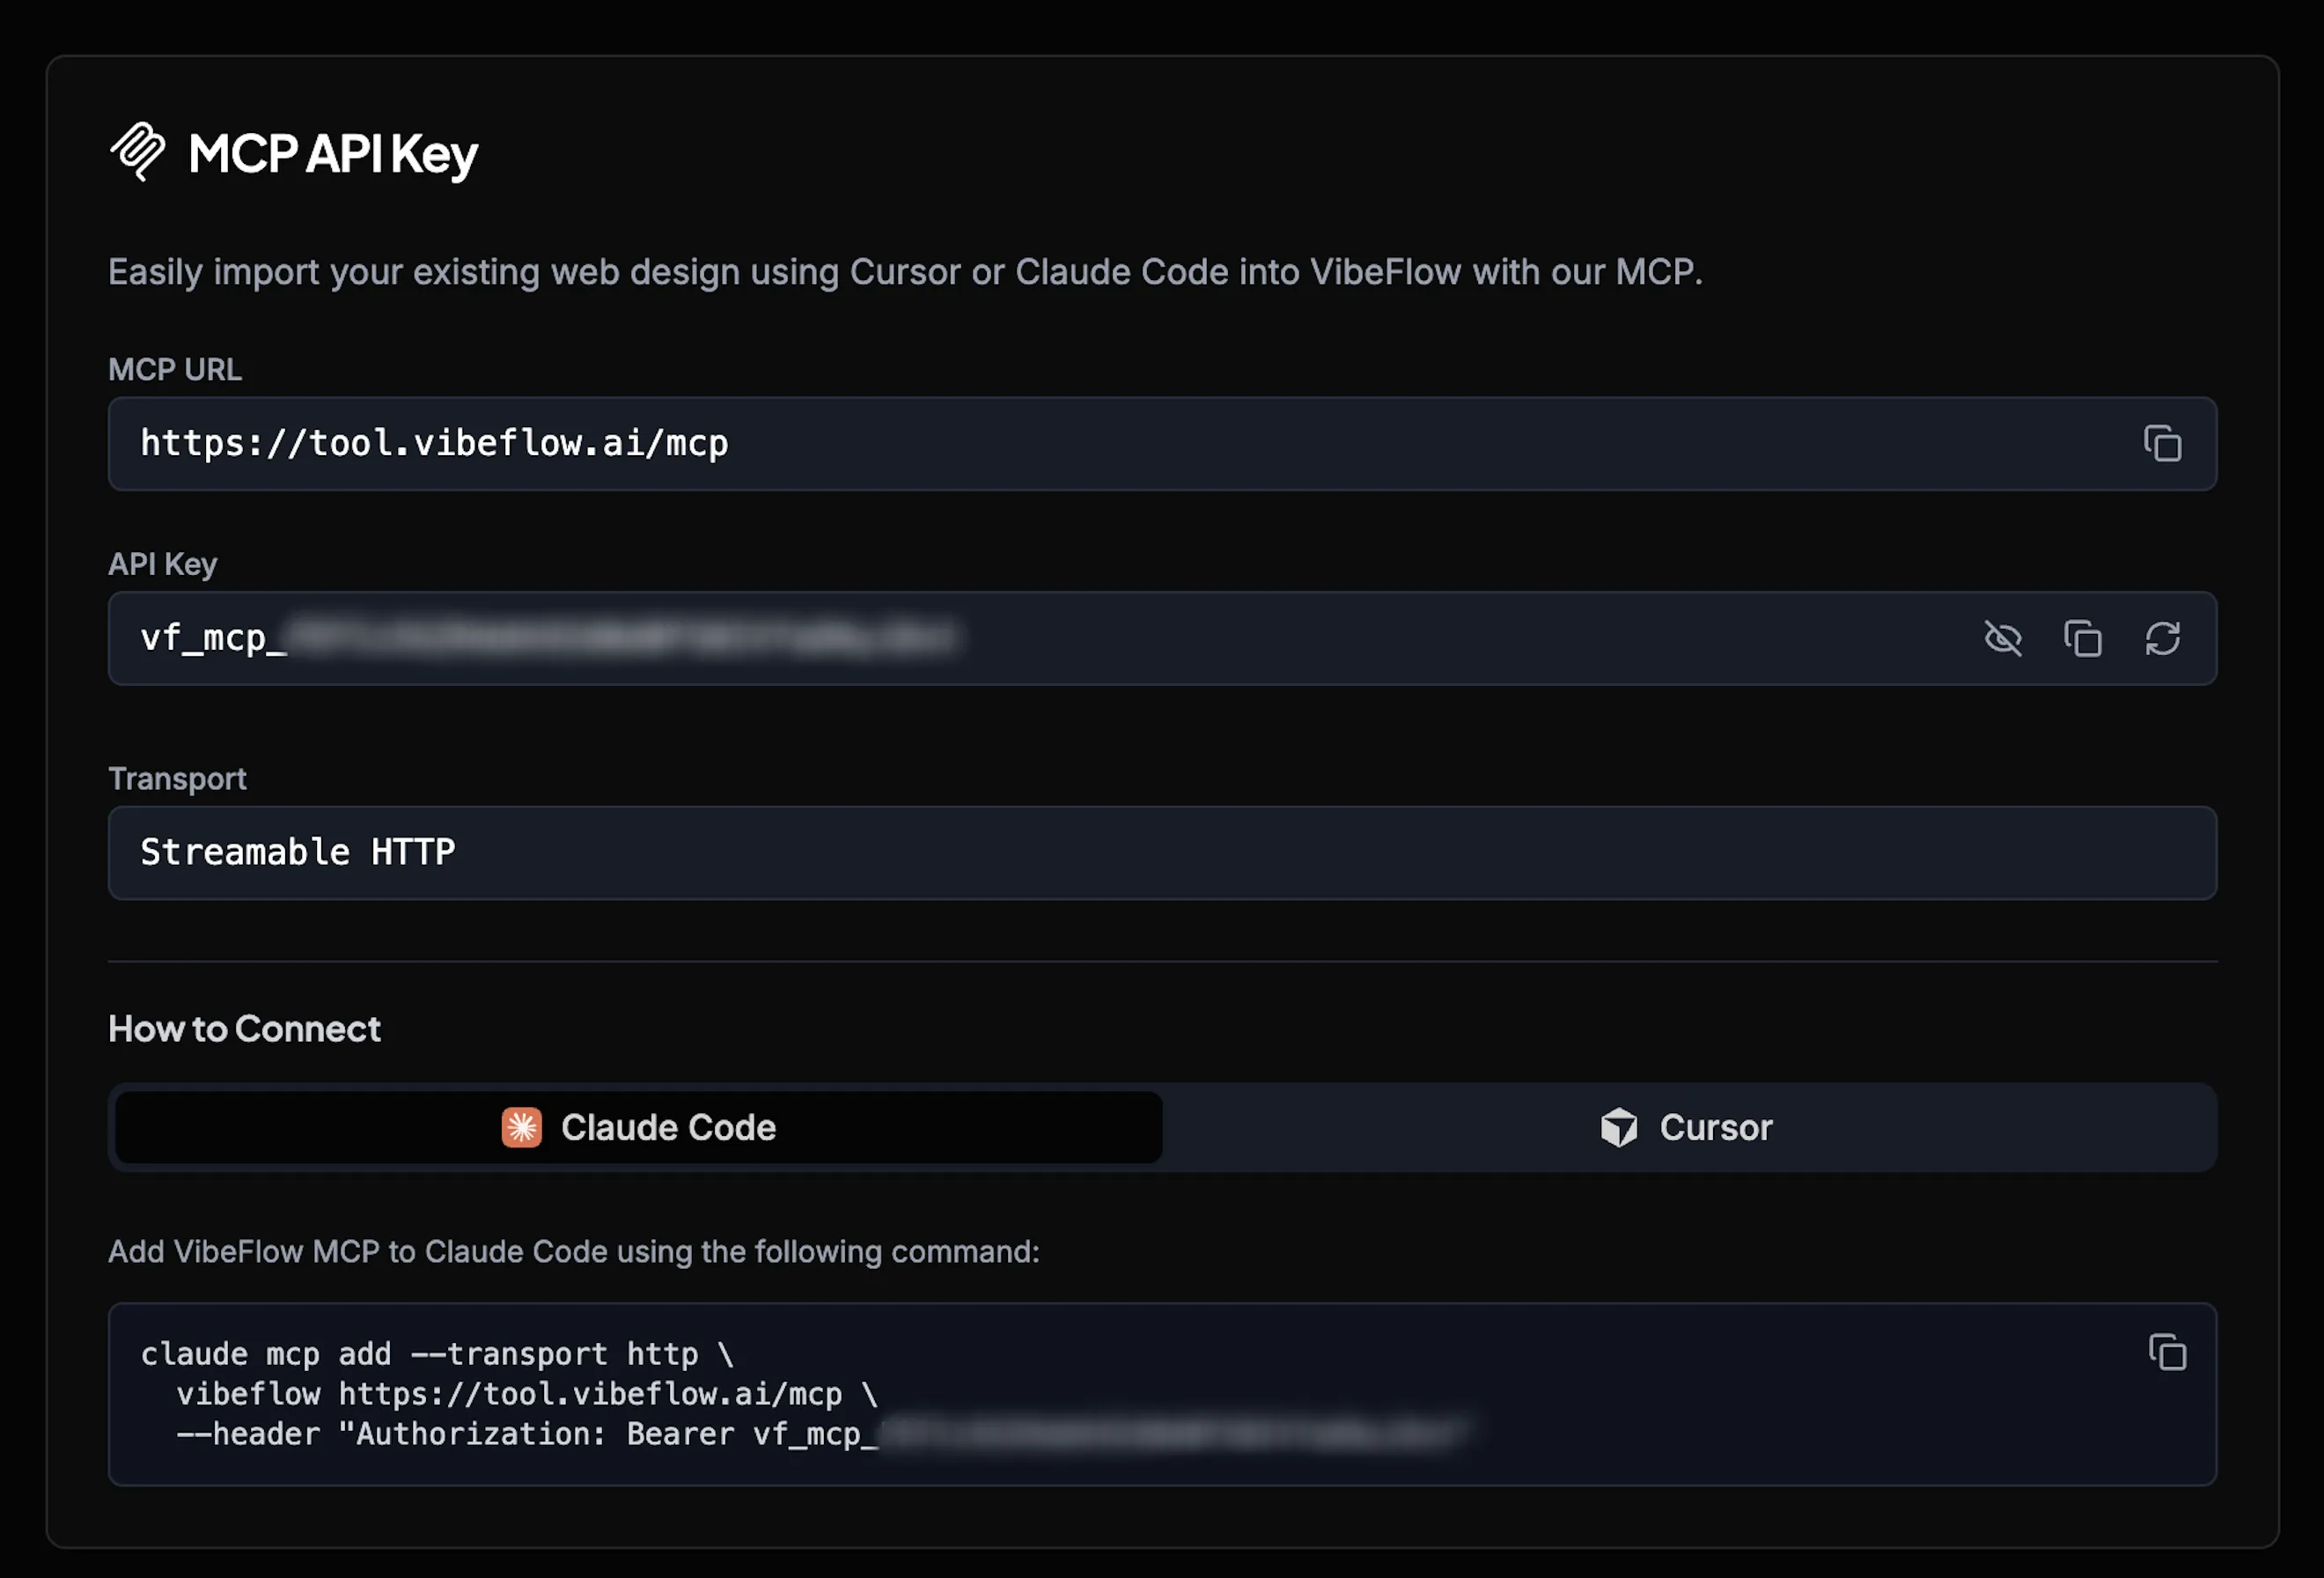
Go to Settings → More in your VibeFlow account. You’ll see the MCP API Key section:
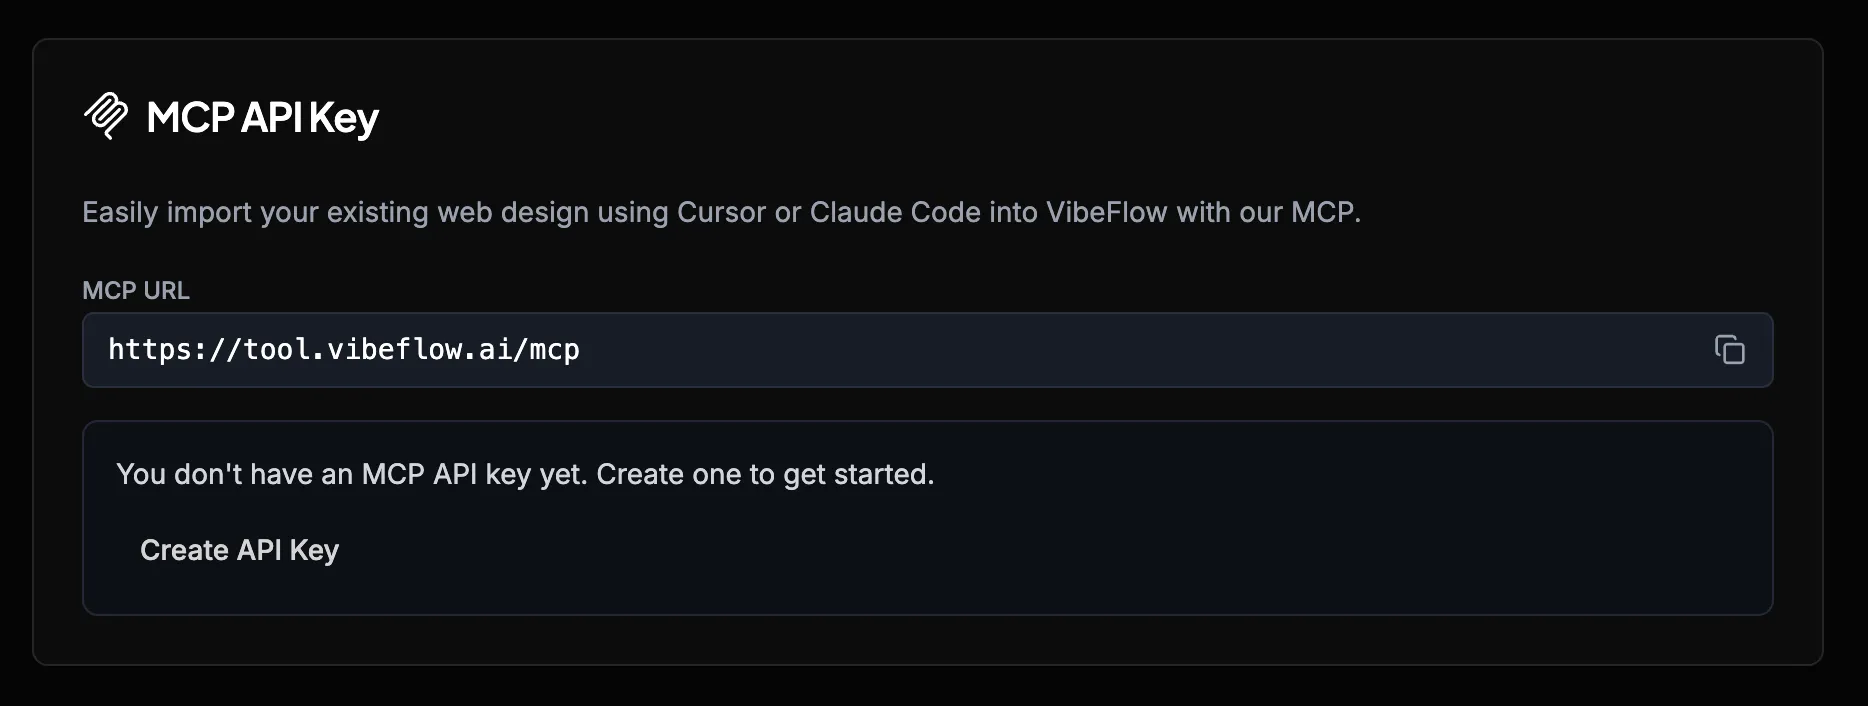
Click “Create API Key” and follow the instructions shown on the page. It’s literally copy-paste - the connection command is already prepared for you.
Create a design system:
You: "Create a design system for my e-commerce store with a trustworthy, modern aesthetic"Add components:
You: "Add a primary button component to my Modern SaaS UI design system. Make it blue with rounded corners and support hover states."Update colors:
You: "Change the primary color in my design system to a deeper blue - #0052CC"Generate variants:
You: "Create a dark mode version of all my components"Everything syncs to your VibeFlow account in real-time.
Why This Is a Game Changer
Work Across All Your Projects: You have access to tons of repos locally. Manage your design systems within VibeFlow and reuse them across all your projects by exporting your system as a markdown file or Claude Code skill.
Manage From Anywhere: Import design systems from screenshots, Figma, or create them via MCP. Then use them inside VibeFlow to generate websites that follow good design patterns automatically.
Import Components from Anywhere
You can also import components into your design system from multiple sources:
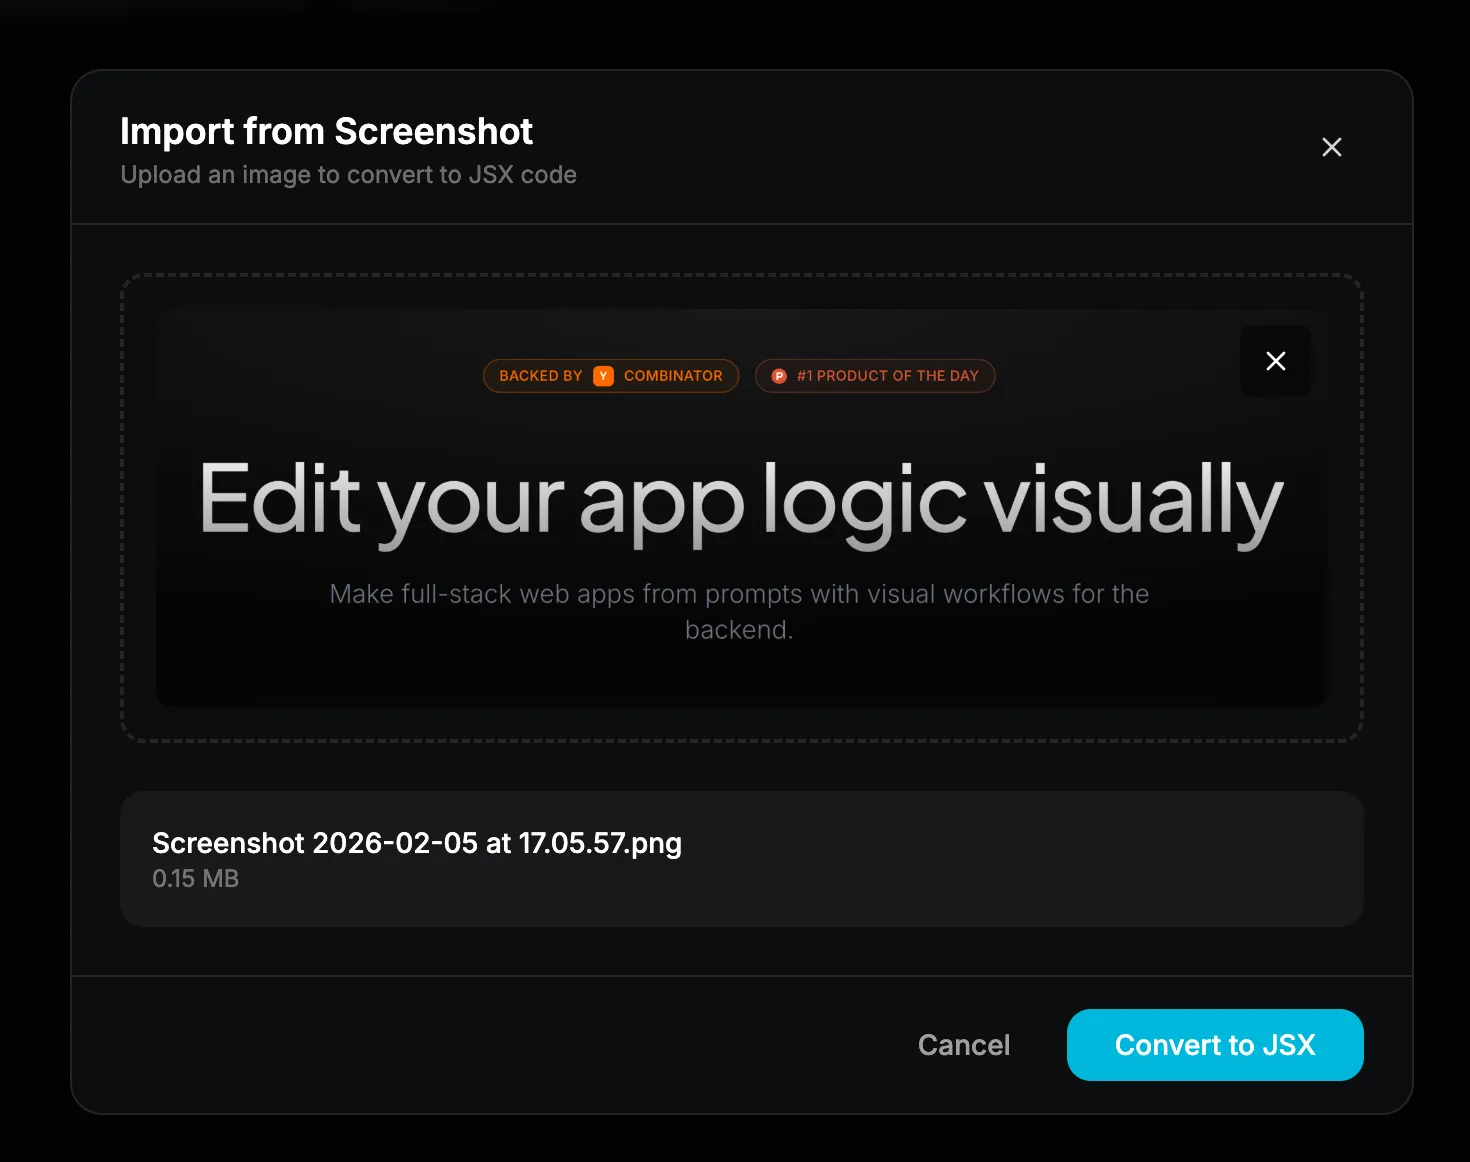
From Screenshots
Have a beautiful UI in an app or website? Take a screenshot, upload it to VibeFlow, and AI converts it to a React component.
- Screenshot a component you like
- Upload to VibeFlow
- AI analyzes and converts to JSX
- Review and save to your design system
Perfect for:
- Converting design mockups to code
- Rebuilding legacy components
- Capturing inspiration from the web
From Websites (Vibeflow Clipper)
Want to capture components directly from any website? The Vibeflow Clipper browser extension lets you clip UI components from live websites and import them into your design system.
- Install the Vibeflow Clipper extension
- Navigate to any website
- Click the extension and select a component
- Component is automatically added to VibeFlow
The extension works on any website - clip navigation bars, cards, forms, or entire page sections. Perfect for building a library of real-world component examples.
From Figma
Design in Figma? Import components directly:
- Copy Figma component URL
- Paste into VibeFlow
- VibeFigma converts to React
- Component added to your library
No more manual Figma-to-code translation.
With Vibe Designer
Don’t have a screenshot or Figma file? Just describe what you want:
Prompt: "Create a pricing card component with three tiers, a 'Most Popular' badge, and feature checkmarks. Use my design system colors and spacing."Vibe Designer generates it based on your design system guidelines.
Use Your Design System Everywhere
Once you’ve created a design system (via MCP, Figma import, or in the web app), you can use it across all your tools:
In VibeFlow Projects:
To use your design system in VibeFlow, simply select it from the chat interface before prompting:
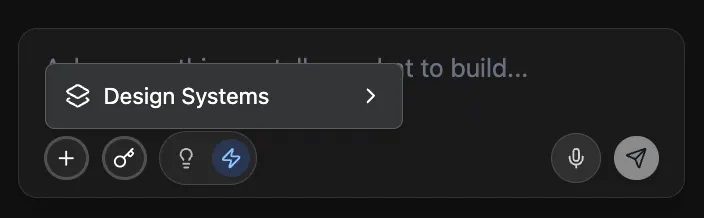
Click on the “Design Systems” button in the chat, select your design system, and Vibe Agent will automatically read your design guidelines and generate UIs that perfectly match your style.
In Claude Code:
Export your design system as a markdown file from VibeFlow, then use it when prompting:
claude "Create a settings page using the Modern SaaS UI design system" --file design-system.mdClaude Code reads your design system file and generates code that follows your exact guidelines.
In Cursor:
With the MCP server installed, just reference your design system:
You: "Generate a login page using my Modern SaaS UI design system"Cursor generates code matching your design language.
Conclusion
Design systems in VibeFlow work across all your development tools. Create them through conversation in Claude Desktop or Cursor, import components from screenshots or Figma, and use them in your projects instantly. Your AI assistants understand your design language and apply it automatically.